Follow My New Blog

I've started a new blog. Follow my crafting adventures on creativeirony.com.

Monday, March 30, 2015

"You Octopi My Heart" Nursery Art Print/Printable

Although I'm more than done having children (having four in four and a half years will cure you pretty quickly), I often get uterus cramps while looking at small babies. If anyone knows of any babies locally I could rent for an afternoon, I'm available.

I had to cure my baby hankering somehow, so I created this printable nursery art as a little stopgap. It's 8x10, but should crop smaller. It would be pretty cute as Valentine's Day cards too, now that I think about it.


You Octopi My Heart baby printable from Craftastical!


Please share on Pinterest, if you like! Thanks!
I've started a new blog: Come follow my crafting adventures on my new blog. Find me at: creativeirony.com.

Monday, March 23, 2015

"Have Courage and Be Kind" Free Printable

While my children were sleeping over at Grandma's house this weekend, my husband and I sneaked off to the theater to see Cinderella. Yeah, we were mean and didn't take the kids yet. I didn't expect to love the movie like I did, but even though I aim for misanthrope, I land in big-softy-with-gooey-center territory more often than not. I loved this theme that they wove throughout the movie, and even during the movie, I was thinking, "I have to make a printable with that!"
I've started a new blog: Come follow my crafting adventures on my new blog. Find me at: creativeirony.com.

Thursday, March 19, 2015

Free Printable: Love My Camera

A little while ago, I wanted to replace one of the pieces in my kitchen. It didn't have any glass in the front (it fell off the wall one too many times--kids skirting too close to the wall and before I wised up and used mounting tape for all my picture hanging needs), and it was all gross, from the lack of glass. Or maybe it just got gross because I have children. Whichever.

It was time for a change, and this is what I came up with: an 8x10 print that immortalizes for all time my love of the camera. It doesn't have the border--that's so the wording would fit.

I hope you enjoy!


I've started a new blog: Come follow my crafting adventures on my new blog. Find me at: creativeirony.com.

Monday, March 16, 2015

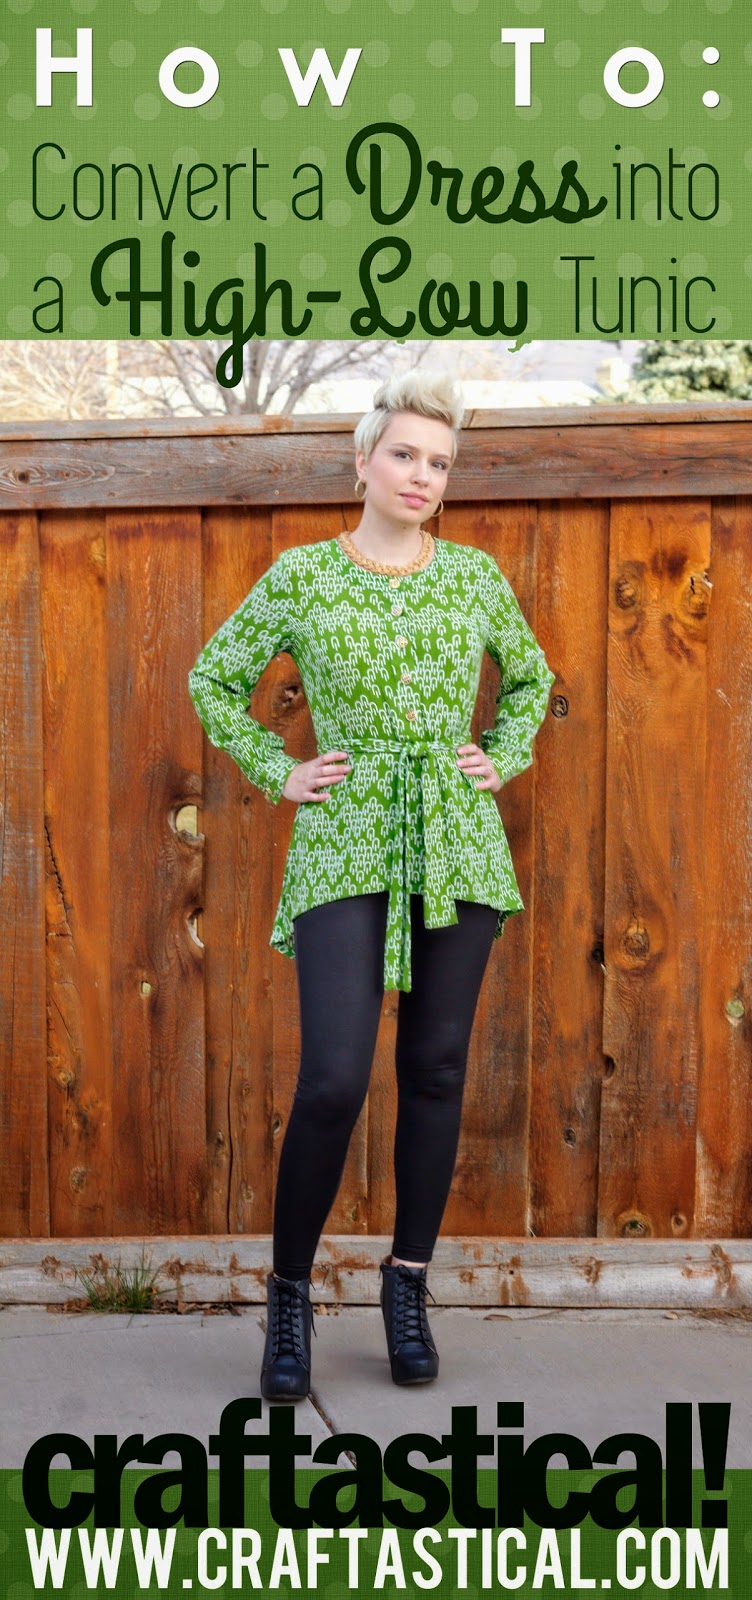
How to Convert a Dress into a High-Low Tunic

How to convert a dress into a high-low tunic from Craftastical!

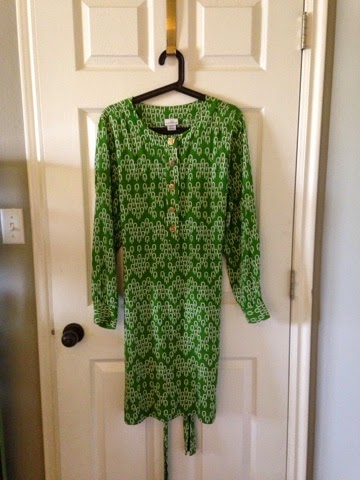
Saint Patrick's Day is upon us, and I realized I have very little green in my wardrobe, which is unacceptable. I searched through three stores, not finding anything green that looked good on me, and finally found a cute green dress at the local thrift store in town, AND it was half off day, so the grand total for this dress? $2.50. Only, it was a bit. . . frumpy? Action had to be taken.

Dress before high-low tunic conversion

I decided to modernize it by making it into a high-low tunic. It was actually a lot easier than I was expecting and only took me about 30 minutes. I love any sort of thrift store find (half my wardrobe is from thrift stores or consignment shops), and I love all things upcycled and restyled.

Here's my tutorial, so you can try it too.

STEP ONE
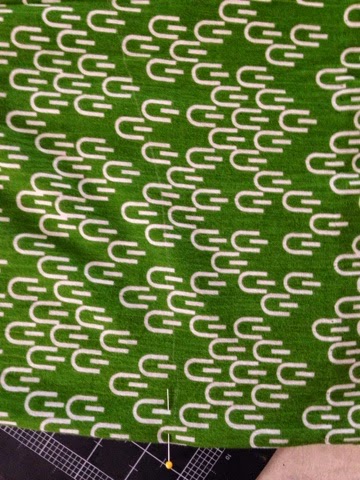
First, put on your dress/skirt/extremely long shirt, whatever you are converting. Mark the length of the front hem with a pin exactly in the middle (I would actually use safety pins--one of mine fell out when I took off the dress). Do the same with the back. Obviously, the back is going to be anywhere from 3-4 inches longer to, well, as long as you want. Drama, baby.

Front pin (hard to see with that pattern, but it's there):
Marking the dress hem in the front

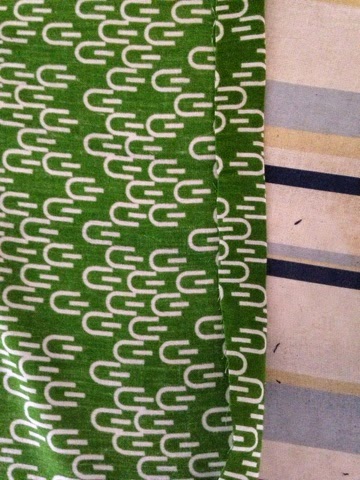
Back pin:
marking the dress hem in the back

STEP TWO
Next, you're going to cut your hem. Remember to leave 1-2" of seam allowance.

To mark the hemline, lay the garment on its side, with the side seams matched up. This should leave your marking pins on the fold lines for the front and back.

Side seams matching and folded exactly along the front and back:
setting up the hem to be cut

Draw your line for your hem (remember seam allowance). This is probably the trickiest bit. Remember you're going to want to hit the fold at a right angle so you don't create a point, and you're going to want most of the "high-low" movement to happen at the sides, leaving the front and back fairly level.

I used a white fabric pencil to mark my line:
marking the hem line

I used a rotary cutter to make a smooth cut. Fabric scissors will do the same thing though. Cut through both layers of fabric at the same time. Once you've cut your line, try on the garment again before hemming, to make sure you like the line. I realized my cut wasn't curvy enough the first time, and cut a tiny bit more off, after I lined everything back up again.

My finished cut:
the finished cut hem line

STEP THREE
Once I had my hem line like I liked it, it was time to iron the hem. Turn up however much you allowed, and iron. You're going to want to finesse this a bit--you've got some curves and that's always a bit tricky to get to iron flat, but most fabrics will adjust if you work them a bit.

Raw edge turned up:
ironing the hem line

Then turn the raw edge under again, making it meet the ironed fold and press.

Raw edge turned under again towards fold:
ironing the hem line

Once that's all done, stitch the hem down. You can use a machine or hand sew. I chose to hand-stitch my hem, but a machine will do the job just as well. Just make sure to ease as you go, since you're sewing curves here.

Hand stitching my hem down with matching thread:
hemming upcycled dress

Then wear your new tunic with pride! I love how mine turned out.

How to upcycle a dress into a high-low tunic from Craftastical!

Also, one of my friends calls this hemline a mullet hem, and I'm pretty sure that wins the internet.

Linked Up Here:
Tatertots and Jello
I've started a new blog: Come follow my crafting adventures on my new blog. Find me at: creativeirony.com.

Friday, March 13, 2015

My Kids Are Growing Up and Learning to Code!

It's pretty miraculous that I got my laptop back from my oldest two children so that I could write this post. They've discovered codecademy, and since we are currently taking a break from video games (the fighting, please save me from the fighting), they are eager to keep going with learning HTML. Xander is 12 and Maxton is 11 years old, and it makes my little web-designer/proud-mama heart do a small jig to see them learning.

How long before I can farm them out or have them take over my job on the sly? Two weeks or so?

Learn to code at http://www.codecademy.com/

Anyway, I'm even using codecademy to make sure my skills are more well-rounded. I highly recommend it (also, they don't know I'm saying this. Just my experience with the site, which I really like, and all the standard disclaimers).
I've started a new blog: Come follow my crafting adventures on my new blog. Find me at: creativeirony.com.

Monday, March 09, 2015

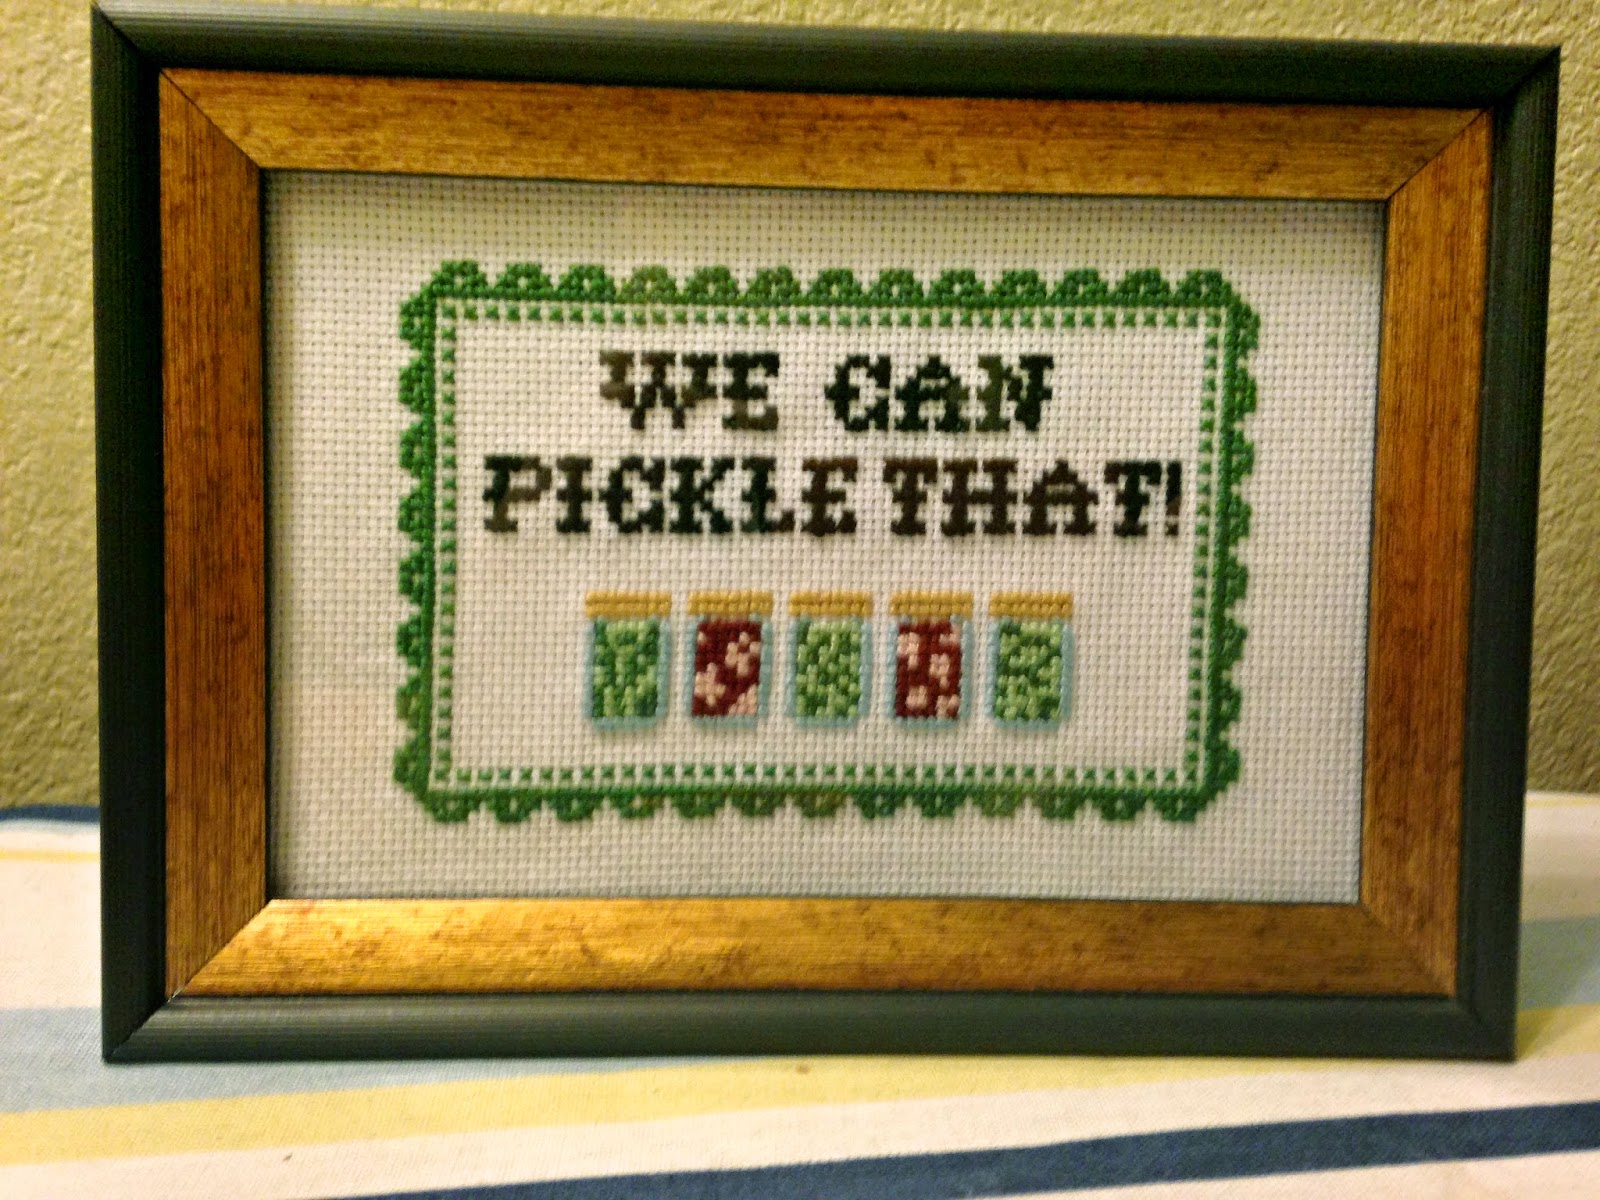
We Can Pickle That! Subversive Cross Stitch

This Christmas, I suddenly had the urge to cross stitch. It's been years since I did cross stitching. I think my last project was a blanket for my oldest son, who is now twelve (pick me off the floor, because I don't believe he is that old). So, it's been a while.

But, I've been seeing those subversive cross stitch projects around, and it's hard to resist the juxtaposition of such a traditional looking project with such an unexpected message.

I searched through a lot of options before finding the perfect one for my sister. It's based on this Portlandia sketch. Although my sister isn't a fan of the show (I don't think she's ever seen it), she is a huge canner. I mean, she cans things. Usually out of her own garden, which she plants from seeds. That is some serious homemaking crap that I cannot keep up with.

The finished project (which she loved by the way):

We Can Pickle that Subversive Cross Stitch

You can find the pattern here.
I've started a new blog: Come follow my crafting adventures on my new blog. Find me at: creativeirony.com.

Friday, November 28, 2014

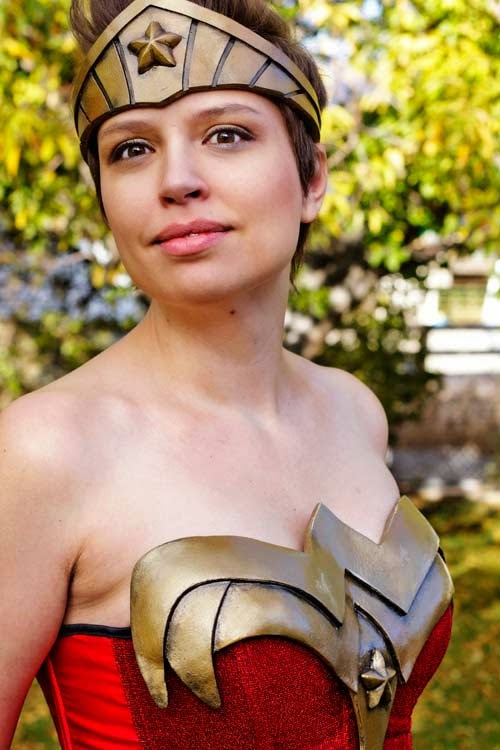
Wonder Woman Cosplay

Wonder Woman Cosplay from Craftastical using Wonderflex

It's been a while since I went all out on a Halloween costume, but David talked me into trying out Wonder Woman this year. Of course, this involved figuring out how to make my own custom-made armor, because why do anything the sensible, easy way?

This tutorial about how to make Wonderflex armor was invaluable in this process.

So, I started with the idea. After looking through hundreds of photos of Wonder Woman online, I sketched my own concept based on what I liked the best.

wonder woman costume sketch

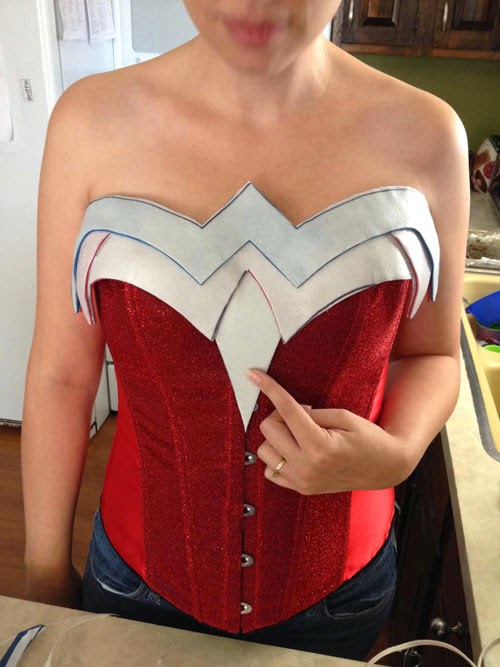
Now, it was time to shop for boots and the corset. We got one corset, and it was too small. I wanted the corset lacing to either meet, or to have a panel, and it probably had a six inch gap with no panel. The peril of ordering on the internet. So, we tried a different style. This time it was too big. Of course. So, I ended up just taking it in.

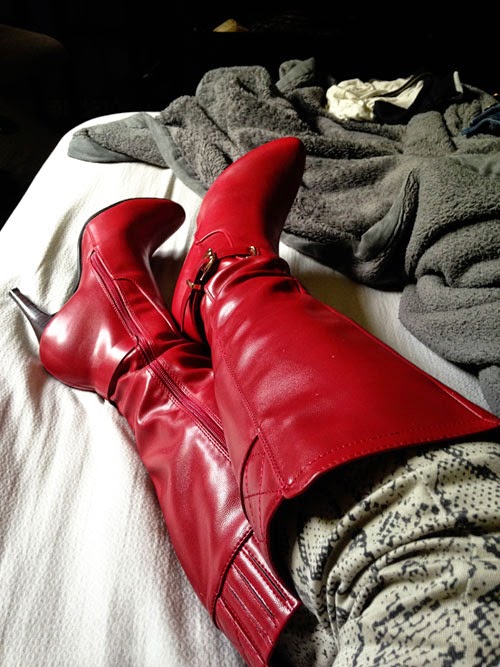
I also looked at probably hundreds of pairs of boots. I could have got the classic Wonder Woman boots, but I thought it would be more fun to go with something a little more realistic looking, to match the mood of the costume, and so I could wear them after Halloween too. I love the pair I got. When they came in the mail, I put them on and told David I was never taking them off.

Wonder Woman Cosplay from Craftastical using Wonderflex


Once we had the corset sorted, we started patterning the armor. It didn't seem like much, but there were a ton of different pieces to pattern, and then the problem of how to actually attach everything so it could come on and off my body had to be worked out before we made pieces.

I wish I had taken more photos of patterning, but I didn't start until we started molding. We used mostly Wonderflex backed with craft foam to make the pieces. I wouldn't do that again. The craft foam did not like sticking to the Wonderflex and it was a pain in the butt. I think several layers of Wonderflex is a much better option.

So, here's the front belt piece after the first mold, and then with the layers on top to add dimension.

Wonder Woman Cosplay from Craftastical using Wonderflex

Wonder Woman Cosplay from Craftastical using Wonderflex

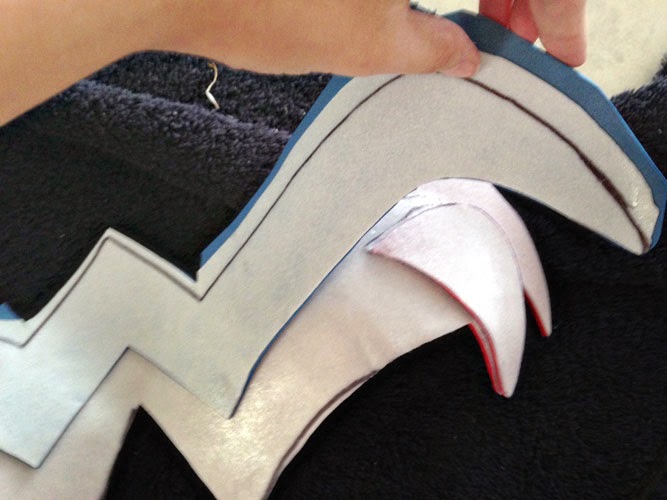
I can't believe I don't have more in progress shots of the breastplate. Urg! It was the most challenging, because it had more complicated curves and levels. I did put in one little dart and that helped mold the curves a bit.

Wonder Woman Cosplay from Craftastical using Wonderflex

There you can see I'm building up the levels.

Wonder Woman Cosplay from Craftastical using Wonderflex

 You can see at this point, there are still a lot of waves and bumps.

Wonder Woman Cosplay from Craftastical using Wonderflex

We ended up covering a lot of it with Apoxie Sculpt, which was another giant pain. I don't think I mixed it correctly, so it was sticky, and impossible to get where I wanted it. And then it dries to concrete. You can sand it, and I spend hours sanding it.

We also made the stars out of Apoxie Sculpt. The stars were also a pain in the rear. I would do them differently now. I knew I wanted that shape and type of star, but how to get the very sticky stuff in the mold (which took us AGES to find--we were even going to make our own mold at one point), and then out again without destroying the star? We end up using olive oil. Which was ok. But, I would have lined it with cling wrap and then coated the inside with olive oil. I bet they would have come out so nicely.

The red you see up there isn't the Apoxie Sculpt, it's filler. Which then had to be sanded. Again.

Wonder Woman Cosplay from Craftastical using Wonderflex

First coat of paint! I actually ended up painting them three times. I wanted a slightly aged look, but couldn't figure out the right balance. Eventually, did a mix of two spray paints, and then mixed gold acrylic paint with browns, yellows, blacks and whites to age the top, and then ever so slightly misted that with spray paint. And then a top coat of polyurethane.

The bracers were actually done with a sheet of ABS plastic, craft foam and a touch of Wonderflex. Same with the tiara. It was a lot harder to heat to mold--but we were using my embossing gun from my stamping days. With an actual heat gun, it might have been a bit easier.

Wonder Woman Cosplay from Craftastical using Wonderflex

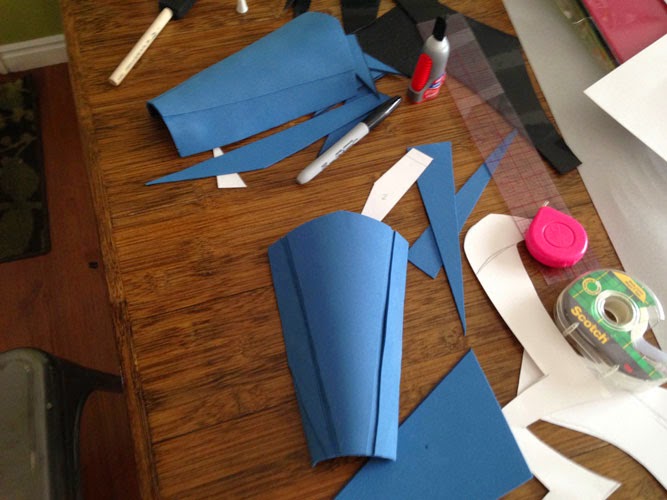
The basic bracer with a layer of craft foam, and then another layer for the dimension. (On the right is one of the paper pattern pieces.)

Wonder Woman Cosplay from Craftastical using Wonderflex

Adding the stars. I had to sand them down for ages to get them to curve. I wish I had figured out a better way to mold them so I could have just stuck down the clay when wet and avoided that whole mess. Next time!

Wonder Woman Cosplay from Craftastical using Wonderflex

The pieces to make the recesses traced and ready to cut out.

Wonder Woman Cosplay from Craftastical using Wonderflex

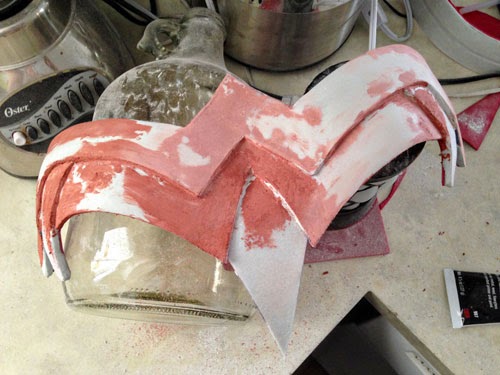
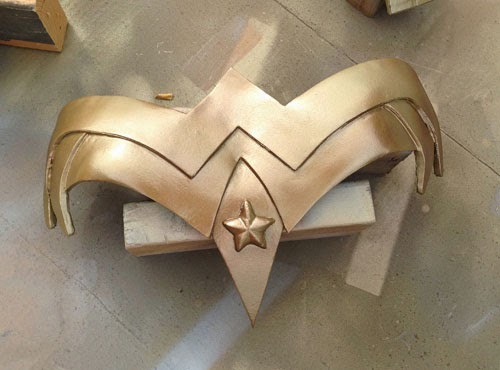
The tiara ready for paint. You can see the black ABS plastic (Wonderflex is white).

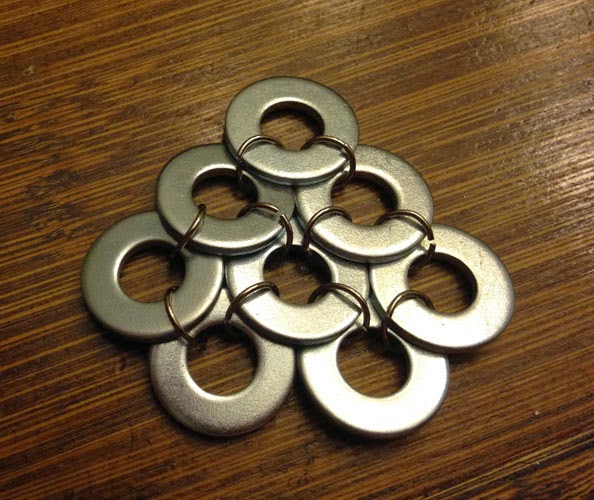
The chainmail was all handmade from washers and jump rings.

Wonder Woman Cosplay from Craftastical--handmade chainmail

Wonder Woman Cosplay from Craftastical--handmade chainmail

We found the red belt on the back at a thrift store and attached it to the armor with screws. The belt also comes apart in the front with overall hooks. Yes, the kind of overalls that are currently coming back into style. I found the hooks at JoAnn Fabrics.

Wonder Woman Cosplay from Craftastical using Wonderflex


The skirt I sewed from suede fabric. The star on the front is hand-stitched, and the other stars are metal--those things that you stick into fabric with the prongs that bend to attach. Studs, maybe? The bottom metal looking things on the end of each flap is wonderflex again, painted, with metal spike studs on each end.

The skirt is all attached to the belt. The back piece velcros so the belt still can unbuckle in the back. I got a swimsuit bikini bottom to wear under the whole thing.


Wonder Woman Cosplay from Craftastical using Wonderflex

Wonder Woman Cosplay from Craftastical using Wonderflex

Wonder Woman Cosplay from Craftastical using Wonderflex

Wonder Woman Cosplay from Craftastical using Wonderflex

Wonder Woman Cosplay from Craftastical using Wonderflex

I've started a new blog: Come follow my crafting adventures on my new blog. Find me at: creativeirony.com.