Follow My New Blog

I've started a new blog. Follow my crafting adventures on creativeirony.com.

Showing posts with label costume. Show all posts

Friday, November 28, 2014

Wonder Woman Cosplay

Wonder Woman Cosplay from Craftastical using Wonderflex

It's been a while since I went all out on a Halloween costume, but David talked me into trying out Wonder Woman this year. Of course, this involved figuring out how to make my own custom-made armor, because why do anything the sensible, easy way?

This tutorial about how to make Wonderflex armor was invaluable in this process.

So, I started with the idea. After looking through hundreds of photos of Wonder Woman online, I sketched my own concept based on what I liked the best.

wonder woman costume sketch

Now, it was time to shop for boots and the corset. We got one corset, and it was too small. I wanted the corset lacing to either meet, or to have a panel, and it probably had a six inch gap with no panel. The peril of ordering on the internet. So, we tried a different style. This time it was too big. Of course. So, I ended up just taking it in.

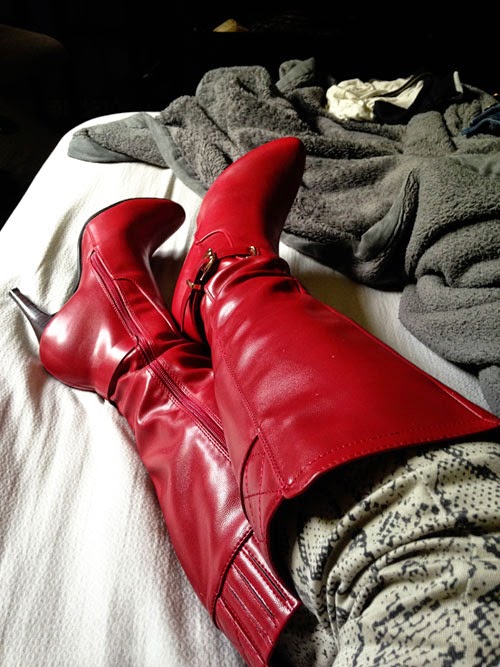
I also looked at probably hundreds of pairs of boots. I could have got the classic Wonder Woman boots, but I thought it would be more fun to go with something a little more realistic looking, to match the mood of the costume, and so I could wear them after Halloween too. I love the pair I got. When they came in the mail, I put them on and told David I was never taking them off.

Wonder Woman Cosplay from Craftastical using Wonderflex


Once we had the corset sorted, we started patterning the armor. It didn't seem like much, but there were a ton of different pieces to pattern, and then the problem of how to actually attach everything so it could come on and off my body had to be worked out before we made pieces.

I wish I had taken more photos of patterning, but I didn't start until we started molding. We used mostly Wonderflex backed with craft foam to make the pieces. I wouldn't do that again. The craft foam did not like sticking to the Wonderflex and it was a pain in the butt. I think several layers of Wonderflex is a much better option.

So, here's the front belt piece after the first mold, and then with the layers on top to add dimension.

Wonder Woman Cosplay from Craftastical using Wonderflex

Wonder Woman Cosplay from Craftastical using Wonderflex

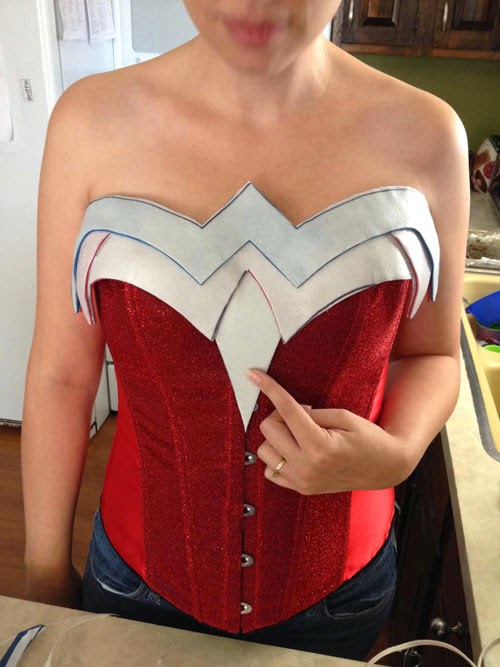
I can't believe I don't have more in progress shots of the breastplate. Urg! It was the most challenging, because it had more complicated curves and levels. I did put in one little dart and that helped mold the curves a bit.

Wonder Woman Cosplay from Craftastical using Wonderflex

There you can see I'm building up the levels.

Wonder Woman Cosplay from Craftastical using Wonderflex

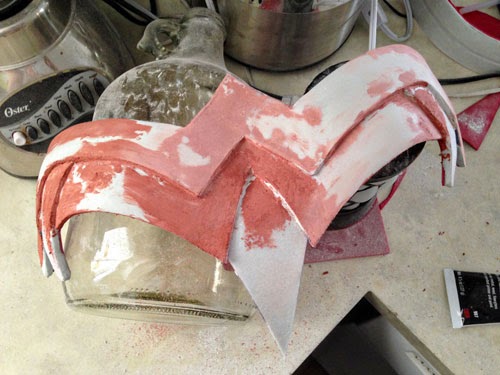
 You can see at this point, there are still a lot of waves and bumps.

Wonder Woman Cosplay from Craftastical using Wonderflex

We ended up covering a lot of it with Apoxie Sculpt, which was another giant pain. I don't think I mixed it correctly, so it was sticky, and impossible to get where I wanted it. And then it dries to concrete. You can sand it, and I spend hours sanding it.

We also made the stars out of Apoxie Sculpt. The stars were also a pain in the rear. I would do them differently now. I knew I wanted that shape and type of star, but how to get the very sticky stuff in the mold (which took us AGES to find--we were even going to make our own mold at one point), and then out again without destroying the star? We end up using olive oil. Which was ok. But, I would have lined it with cling wrap and then coated the inside with olive oil. I bet they would have come out so nicely.

The red you see up there isn't the Apoxie Sculpt, it's filler. Which then had to be sanded. Again.

Wonder Woman Cosplay from Craftastical using Wonderflex

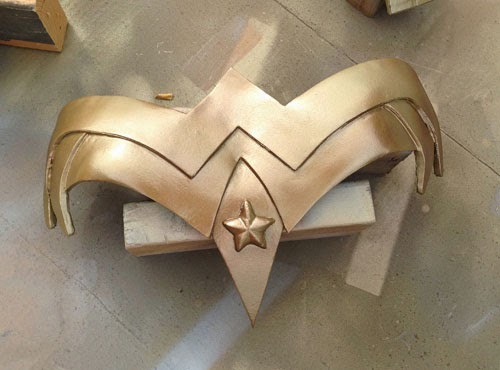
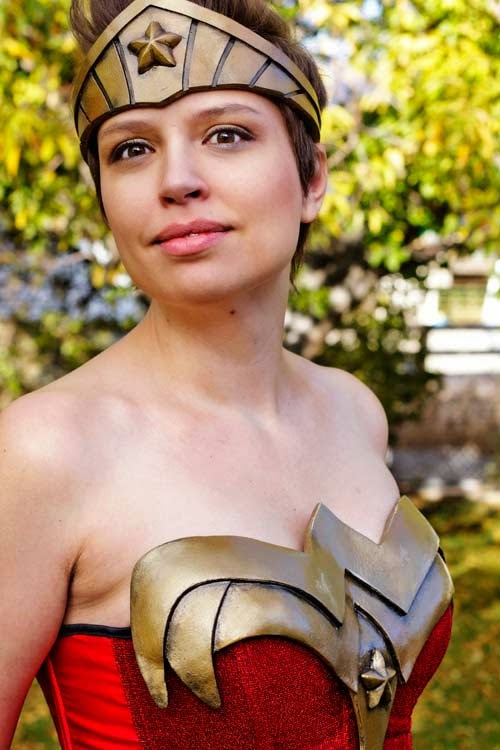
First coat of paint! I actually ended up painting them three times. I wanted a slightly aged look, but couldn't figure out the right balance. Eventually, did a mix of two spray paints, and then mixed gold acrylic paint with browns, yellows, blacks and whites to age the top, and then ever so slightly misted that with spray paint. And then a top coat of polyurethane.

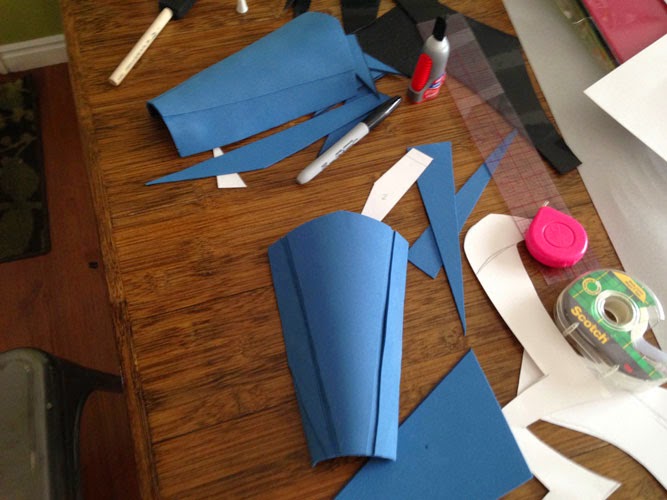
The bracers were actually done with a sheet of ABS plastic, craft foam and a touch of Wonderflex. Same with the tiara. It was a lot harder to heat to mold--but we were using my embossing gun from my stamping days. With an actual heat gun, it might have been a bit easier.

Wonder Woman Cosplay from Craftastical using Wonderflex

The basic bracer with a layer of craft foam, and then another layer for the dimension. (On the right is one of the paper pattern pieces.)

Wonder Woman Cosplay from Craftastical using Wonderflex

Adding the stars. I had to sand them down for ages to get them to curve. I wish I had figured out a better way to mold them so I could have just stuck down the clay when wet and avoided that whole mess. Next time!

Wonder Woman Cosplay from Craftastical using Wonderflex

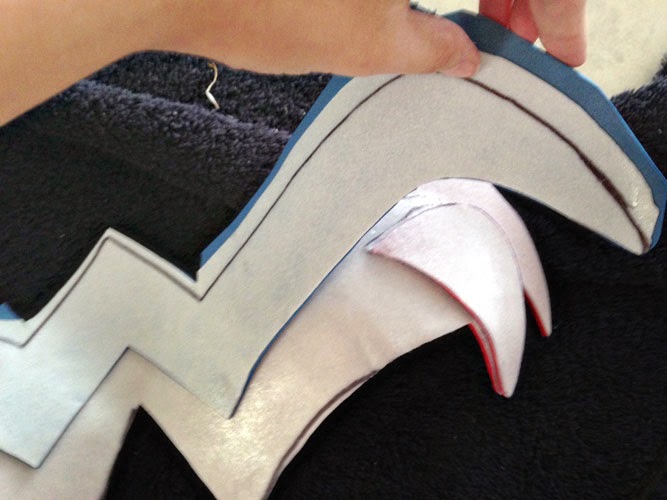
The pieces to make the recesses traced and ready to cut out.

Wonder Woman Cosplay from Craftastical using Wonderflex

The tiara ready for paint. You can see the black ABS plastic (Wonderflex is white).

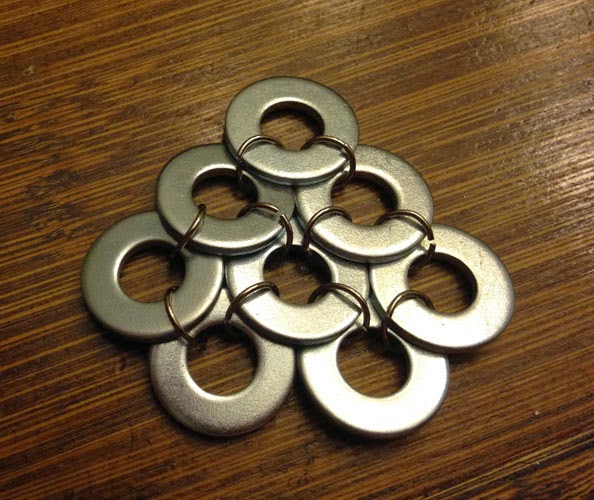
The chainmail was all handmade from washers and jump rings.

Wonder Woman Cosplay from Craftastical--handmade chainmail

Wonder Woman Cosplay from Craftastical--handmade chainmail

We found the red belt on the back at a thrift store and attached it to the armor with screws. The belt also comes apart in the front with overall hooks. Yes, the kind of overalls that are currently coming back into style. I found the hooks at JoAnn Fabrics.

Wonder Woman Cosplay from Craftastical using Wonderflex


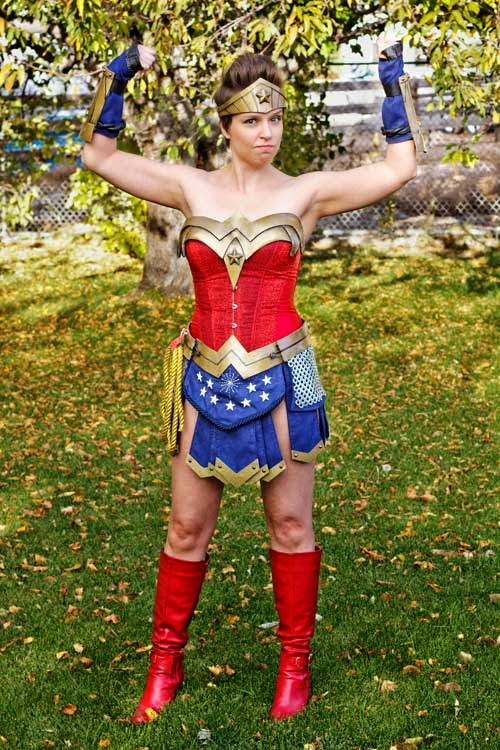
The skirt I sewed from suede fabric. The star on the front is hand-stitched, and the other stars are metal--those things that you stick into fabric with the prongs that bend to attach. Studs, maybe? The bottom metal looking things on the end of each flap is wonderflex again, painted, with metal spike studs on each end.

The skirt is all attached to the belt. The back piece velcros so the belt still can unbuckle in the back. I got a swimsuit bikini bottom to wear under the whole thing.


Wonder Woman Cosplay from Craftastical using Wonderflex

Wonder Woman Cosplay from Craftastical using Wonderflex

Wonder Woman Cosplay from Craftastical using Wonderflex

Wonder Woman Cosplay from Craftastical using Wonderflex

Wonder Woman Cosplay from Craftastical using Wonderflex

I've started a new blog: Come follow my crafting adventures on my new blog. Find me at: creativeirony.com.

Monday, August 05, 2013

Craft Room Furniture! This is Finally Happening!

Hello! It's been a while since I've blogged. I'm afraid to look at how long. If you were reading my blog before, I'm sure you thought it was dead. I meant to keep blogging. I never meant to stop. But, I got very busy trying to be Utah's sole source of actresses between the ages if 17-35. I think I was in every community production In Utah County in the last year. If I wasn't, I saw it or knew someone in it. I got sucked into the vortex of community theater and almost the only crafting I did was sewing my costumes for productions. 

Recently, I was Ms. TeaVee in Willy Wonka. Using a mash up of vintage patterns, I made this dress: 

Ms. TeaVee 50s vintage dress from Willy Wonka

Anyway, I'm getting distracted. What I really came to post about is this disaster: 


Yep, my craft room. Sad, isn't it? And, this is after cleaning up for a while (a long, long while--and paying one of my kids $10 to help me). A huge part of it is that I have no workspace, so stuff ends up everywhere when I'm working. (Also, I have too much stuff, but I'm pretending that isn't a problem.)

Well, my friends, that is about to change! I recently came into a very cool couch and about $100. I want the couch to fit in this room so people can hang out with me while I craft, and the $100 is perfect for building a huge desk.

Last Saturday, David and I went to the Habitat for Humanity Restore looking for kitchen cabinets to use to make this desk. We got a big fat zero, and they were more expensive than I was hoping. I could have cobbled something together, but it would have eaten my entire budget and nothing would have matched. Nothing would have matched! It was not working for me. So, on the way home I got the bright idea to look on KSL (basically the Craig's List of Utah--no idea why everyone posts there, but we do).

And there it was. Some guy remodeled four matching kitchens and was selling off the cabinets for $10 a piece. And he was home when we called! And didn't sound too eccentric! We were wrong about that last part, but that's okay. 

So, we go to this guy's house (which is upgraded in every possible way--the doorbell chime lasted longer than Beethoven's Symphony No. 9); he makes us remove our shoes to walk across the hardwood floors. Then we ride his elevator (yes, elevator) down to the walkout basement four car garage where he has the kitchen cabinets. We pick out six of them, and pay the guy. We was a perfectly nice normal guy. I'm not sure why he had an elevator, but I'll go with it. Our daughter was with us, and she thought it was cool. 

So, here they are, my new cabinets. 

Used kitchen cabinets to convert to office desk

The dude who sold them to us told us there was nothing wrong with them; that they were just outdated. Dude might have an elevator, but he was wrong about that. They are stinky--like old apartment smell--and greasy and damaged in spots. The hinges have plastic pieces that were breaking apart. There is some nasty gunky on one of the shelves that I am not even going to attempt to clean off. That thing is just getting replaced.

However, they are perfect for what I want them to do. More on that soon. Very, very soon. 
I've started a new blog: Come follow my crafting adventures on my new blog. Find me at: creativeirony.com.

Monday, August 06, 2012

How I Spent My Summer Vacation

I spent it at rehearsals for Spanish Fork Community Theater's production of My Fair Lady. And then I performed in 8 shows of My Fair Lady. My part wasn't anything too big: a member of the ensemble, but David was cast as Colonel Pickering.

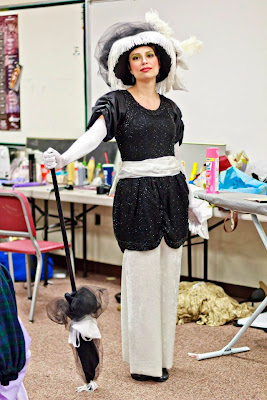
One of the funnest things about being in the ensemble was that I had nearly as many costume changes as anyone else. Five. While the theater provided three, it ended up that I offered to make two of mine: my dress for Ascot (possibly one of the most famous scenes for costumes ever) and my Embassy Waltz dress. For both of them, I didn't use a pattern. Edwardian style is stunning.

Black and white upcycled Ascot costume for My Fair Lady
I've started a new blog: Come follow my crafting adventures on my new blog. Find me at: creativeirony.com.
Tuesday, January 24, 2012

The Bee's Knees Digital Scrapbooking Kit Freebie

New to digital scrapbooking? Never downloaded a digital kit before? What in the world are .rar files anyway? Get your answers here: How to Unzip Files So You Can Digi Scrap.

Apparently, I've gone too long without designing a kit. Shaunte, over at This Too Shall Pass has progressed to harassment in order to get me to design another digital kit. This is good, because I apparently need harassment levels of persuasion in order to get me motivated to do anything after graduating. While harassment isn't supposed to make you feel desirable, I feel privileged to be Shaunte's object of harassment. If she progresses to stalker I will probably never be able to deflate my ego.

(If you don't read Shaunte's blog, you should. She's the type of funny that makes me realize that my attempts at humor are. . .how can I be kind? . . .underdeveloped. Perhaps if I had gone the extra step and had five children like her instead of four, I would have gone that extra bit of insane that would have imbued me with the truly funny stuff--not that I'm commenting on Shaunte. Really. Just on me. But, it's too late now to add any more crazy to our house. I must be content with envying Shaunte's comedic ability and forever wishing I had her finely-honed thrift-store shoe-finding abilities.)


I'm also hoping that this kit will be helpful to another friend who is in charge of an girl's camp this summer. Their theme is centered around bees, hence the theme of this kit. It just so happened to work perfectly with Aubriana's Halloween costume from this past year. Even if you don't have a need for a bee theme, there are plenty of unrelated papers in this kit--I'm quite fond of the clouds and the chevrons.

So, cheers all around for my first digital kit in ages! I enjoyed making it--I forgot how much fun it is to have an excuse to watch endless TV and dink around in Illustrator. I hope you like it!


Kit contains: 33 pattern papers, 1 set stitches, 1 overlay, 1 sheet honeycomb stickers, tags, 1 mask, 1 torn edge, 2 bee stickers, 2 flower stickers

I've started a new blog: Come follow my crafting adventures on my new blog. Find me at: creativeirony.com.