
Follow My New Blog

I've started a new blog. Follow my crafting adventures on creativeirony.com.

Showing posts with label I am cheap. Show all posts

Monday, March 16, 2015

How to Convert a Dress into a High-Low Tunic

How to convert a dress into a high-low tunic from Craftastical!

Saint Patrick's Day is upon us, and I realized I have very little green in my wardrobe, which is unacceptable. I searched through three stores, not finding anything green that looked good on me, and finally found a cute green dress at the local thrift store in town, AND it was half off day, so the grand total for this dress? $2.50. Only, it was a bit. . . frumpy? Action had to be taken.
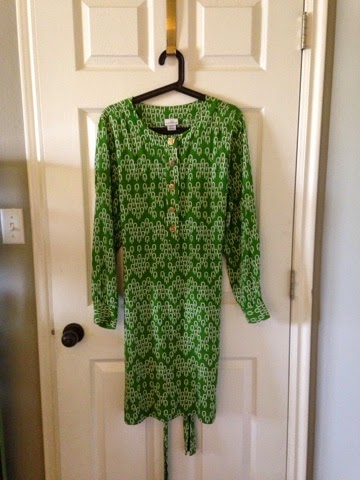
Dress before high-low tunic conversion

I decided to modernize it by making it into a high-low tunic. It was actually a lot easier than I was expecting and only took me about 30 minutes. I love any sort of thrift store find (half my wardrobe is from thrift stores or consignment shops), and I love all things upcycled and restyled.

Here's my tutorial, so you can try it too.

STEP ONE
First, put on your dress/skirt/extremely long shirt, whatever you are converting. Mark the length of the front hem with a pin exactly in the middle (I would actually use safety pins--one of mine fell out when I took off the dress). Do the same with the back. Obviously, the back is going to be anywhere from 3-4 inches longer to, well, as long as you want. Drama, baby.

Front pin (hard to see with that pattern, but it's there):
Marking the dress hem in the front

Back pin:
marking the dress hem in the back

STEP TWO
Next, you're going to cut your hem. Remember to leave 1-2" of seam allowance.

To mark the hemline, lay the garment on its side, with the side seams matched up. This should leave your marking pins on the fold lines for the front and back.

Side seams matching and folded exactly along the front and back:
setting up the hem to be cut

Draw your line for your hem (remember seam allowance). This is probably the trickiest bit. Remember you're going to want to hit the fold at a right angle so you don't create a point, and you're going to want most of the "high-low" movement to happen at the sides, leaving the front and back fairly level.

I used a white fabric pencil to mark my line:
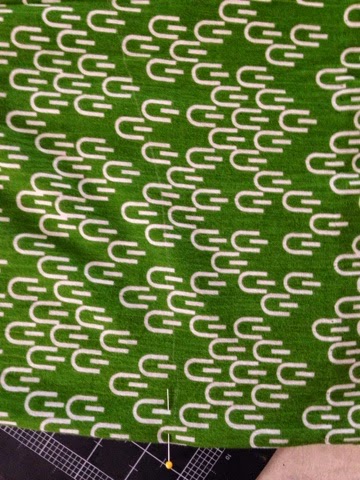
marking the hem line

I used a rotary cutter to make a smooth cut. Fabric scissors will do the same thing though. Cut through both layers of fabric at the same time. Once you've cut your line, try on the garment again before hemming, to make sure you like the line. I realized my cut wasn't curvy enough the first time, and cut a tiny bit more off, after I lined everything back up again.

My finished cut:
the finished cut hem line

STEP THREE
Once I had my hem line like I liked it, it was time to iron the hem. Turn up however much you allowed, and iron. You're going to want to finesse this a bit--you've got some curves and that's always a bit tricky to get to iron flat, but most fabrics will adjust if you work them a bit.

Raw edge turned up:
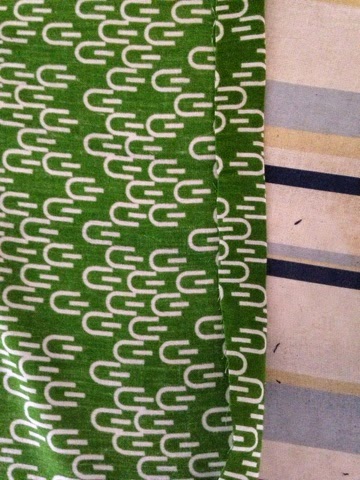
ironing the hem line

Then turn the raw edge under again, making it meet the ironed fold and press.

Raw edge turned under again towards fold:
ironing the hem line

Once that's all done, stitch the hem down. You can use a machine or hand sew. I chose to hand-stitch my hem, but a machine will do the job just as well. Just make sure to ease as you go, since you're sewing curves here.

Hand stitching my hem down with matching thread:
hemming upcycled dress

Then wear your new tunic with pride! I love how mine turned out.

How to upcycle a dress into a high-low tunic from Craftastical!

Also, one of my friends calls this hemline a mullet hem, and I'm pretty sure that wins the internet.

Linked Up Here:
Tatertots and Jello
I've started a new blog: Come follow my crafting adventures on my new blog. Find me at: creativeirony.com.

Tuesday, October 02, 2012

Inexpensive Organizing

This is Part 3 of my How I Organized My Entire House for $0.00 (Really!) series.
Part 1 (Intro) is here.
Part 2 (Simple Rules to Create Organization that Sustains Itself Plus Master Bath Organization) is here.

10 Tips for Inexpensive Organization


Some things I've learned for organizing on the cheap:

  1. Organizing is about your life, not about how much money you spend (obvious, but it took me a little while to learn. I love pretty, fresh school supplies, um, I think I've mentioned my love of pretty containers, I love pretty interior design--all that generally costs money--even though I try to manage to spend as little money as possible). I used to want it to be pretty and perfect or not at all. It doesn't work that way. It can be pretty later. Right now, it just needs to be organized. In fact, it's better to see if what you come up with works, then buy whatever pretty things to put it in. That way you're not investing a money in a system that won't work for you in the long run anyway.
  2. Don't get caught up trying to create the perfect system. Very related to #1. Trying to make the perfect system generally has the effect of making me want to spend $. No system is perfect, but there are systems that work. Like I've said before, if you see a problem, think about how to fix it. Sometimes it's as easy as providing a trash can in the right spot, grouping the right things together, or moving something so that you have easier access. And sometimes it's just accepting that you have to change your habits (hard!).
  3. Get rid of stuff. Less to organize! I recently made a goal to get rid of 100 things. This is something I plan to do regularly. Along with that, don't buy new things. I recently read that if you are contemplating buying a (non-perishable) item, put it on a list and wait a designated period of time: two weeks, a month, whatever. If at the end of that time, you still want/need it, buy it.* I find delayed gratification so hard, but it does help a lot with clutter.
  4. Use "trash" to organize.** Food comes in great containers. If all you have are oatmeal containers, cardboard boxes from cereal boxes, fruit snacks, peanut butter jars, strawberry baskets, mayonnaise jars, peanut containers, empty spice jars, even boxes of soda, then use those. There are lots of ways to dress them up, if you want.*** Baby wipe containers are also quite amazing--ask friends if you don't buy wipes yourself. I've seen great things done with paper towel rolls--and toilet paper rolls, but that grosses some people out.
  5. Use what you have already.**** You've probably bought baskets or plastic containers already. As you organize, you'll find you get rid of things (see #3) or find new systems. A lot of shifting will occur and you can reuse those old containers.
  6. To help with costs, go second-hand. Thrift stores and garage sales can be great for finding containers (the flower vase in the picture came from a garage sale). Canning jars are often easy to find and make pretty good storage containers; also, muffin tins. Sites like Craig's list can be great sources for free cardboard boxes people are looking to ditch after they move. This can work great for some things (the free section even has furniture if you are looking for bigger storage solutions--it doesn't have to be pretty--think basement or garage and hide it--and even if it's ugly for a while, if it's free, you won't feel like you wasted money by buying a cheap temporary option). Even cups or bowls you don't use much can make great storage containers.
  7. Hit up your friends. Trade around. Find an organizing buddy and see if you might have things they can you use and vice versa. When I told my friend Natalie about my project, she said she might have some things I could use--funnily enough, I just realized she gave me those jars that appear in the picture above! 
  8. Another cheap source is the dollar store or bargain stores (although I think this can add up quickly if you're not careful and sometimes you don't get much for your money. Caution.)
  9. Make your own storage.***** There are great tutorials out there for sewing your own fabric boxes, and if you use fabric you already have on hand, it doesn't have to be too much out of pocket. Or use the $4 bed sheets from Walmart for the fabric to get a more uniform look. I've even seen sturdy baskets woven out of paper.
  10. Make your own cleaning supplies. This isn't really about organization, but it will save you tons of money, and when things are clean, you want to keep them organized. There are a few products that I really love that I still buy, but for tons of things, I make my own. There are dozen of recipes out there, and I will probably do a post on my favorites at some point.

I've started a new blog: Come follow my crafting adventures on my new blog. Find me at: creativeirony.com.

Tuesday, September 18, 2012

Medicine and Cleaning Cabinet Organization


This is Part 3 of my How I Organized My Entire House for $0.00 (Really!) series.
Part 1 (Intro) is here.
Part 2 (Simple Rules to Create Organization that Sustains Itself Plus Master Bath Organization) is here.


It occurred to me that this should be my next project when I was sick on last Monday. Super sick. I slept almost the entire day on Sunday (I was awake for like five hours the entire day) and on Monday it felt like my bones are trying to escape from my body. Fun times. Except, I couldn't find the thermometer. Are you surprised, looking at this photo?


Before:
Two very messy cabinet shelves
 After:
two very neat cabinet shelves, with cleaning supplies and medicines

Yeah, I wasn't either. The shelf on the top is our medicines and the bottom has some cleaning supplies and the sunscreen/hand sanitizer/light bulb type stuff. The medicine is actually kind of organized, but it ended up tossed all in there, and some of it was out because that is is the stuff we use the most.

I've started a new blog: Come follow my crafting adventures on my new blog. Find me at: creativeirony.com.

Friday, September 07, 2012

Simple Rules to Create Organization that Sustains Itself Plus Master Bath Organization


This is Part 2 of my How I Organized My Entire House for $0.00 (Really!) series. Part 1 (Intro) is here.

Simple Rules (well, more like guidelines) to create organization that sustains itself

I want to start off this series by giving myself a set of rules (more like guidelines) to follow. It's easy to get carried away and easy to lose sight of your goals, so this will help keep me on-track.
  1. Think about how you live your life. It doesn't make sense to have a system that doesn't work with how you live. Have the things you use together grouped together, not always like with like*. You usually use tape and scissors and wrapping paper together. Have them together. You usually use toothpaste and toothbrushes together (if I'm making any weird assumptions here, feel free to educate me! :) )--make it so you only open one drawer or one cabinet to get them. Think efficiency.
  2. Have the things you use the most in easiest reach. The stuff you use less can be harder to get to. Make things easier on yourself.
  3. Along with number 2, have the things where you use them, or put them where you are more likely to use them.** Don't get too caught up in where things are "supposed" to go. Put them where they work for you.
  4. Make things easy to put away. If they aren't (and you are like me), they won't get put away.
  5. Make it simple. Don't go overboard labeling stuff. Don't make a tiny compartment for everything. Have a place for everything, but there's no need to make it more complicated than it needs to be. If you want. Simple systems are the most self-perpetuating.***
  6. Reevaluate. Organize, then go back a week later and see if it's working. If not, tweak. Just because you organized it one way doesn't mean it has to stay that way. And it's easier to rework it when it's still somewhat organized than when it's completely disorganized because the system didn't work with the way you live.
  7. Get rid of stuff you don't use. I've heard if you haven't used it in the last year, get rid of it. But, I think that's unrealistic. I have things I haven't used in the last year that I want to keep and it would tick me off to replace. But, there is a lot of good in honestly evaluating if you are going to use it. Are you holding onto something because of guilt? Because of what it represents?**** When getting rid of stuff, the biggest thing is to be honest with yourself.
  8. Educate your family on your new system, but don't overwhelm them. Make it fun. Get their input if it affects them (I've found it works a lot better if ideas come from everyone, instead of my trying to impose a top down approach).
  9. It doesn't have to be perfect. It won't be perfect. What you organize now will probably have to be organized again at some point. Hopefully a long, long time from now. But, your life will change. Your needs will change. Don't get caught up in perfectionism or get overwhelmed. One little piece at a time.
*For example, put a pair of scissors in the places where you need them the most--not all the scissors in the same spot. Then the scissors will be where you need them, they won't travel all around the house, end up in tossed random drawers and never make it back to the scissor drawer and then you can't find a pair when you need them. For example, I have a pair of scissors in my bedside table, so does David, a pair in the kitchen for opening food packages, a pair in the office, a pair in the wrapping paper box, a pair in the kids' art box, and then the specialty scissors where they go--do not touch my sewing scissors please

**I have a topical acne medication I need to use every day, but not within 30 minutes before or after showering. When it was in the bathroom, I didn't use it regularly. But, put it by my laptop, and suddenly I remembered to use it twice a day like I am supposed to.

***It's my experience that I will put something box in a drawer, but not necessarily a certain spot in that box in drawer. For example, if I have a box for often-used medicines: works great! If I have a certain spot for Tylenol in the box, it doesn't get put there every time by everyone and I get frustrated. It doesn't work across everything (forks have a certain spot, dang it!), but it's a generally good rule of thumb.

****Sometimes that's ok--you may pry my great-grandma's quilts out of my bloody fingers--but sometimes it means you need to let go of that to get rid of it. I kept some kitchen gadgets for a long time, because if I had kitchen gadgets, then surely it meant that someday I was going to be fabulous and motivated to cook all the time, right? And, it would make life easy, and I would transform into super chef-type "good mom" person. I was invested in seeing myself as "person with cool kitchen gadgets" and invested in thinking that a good mom cooks every night. Once I let go of that--good moms don't have to cook every night--then I could get rid of the clutter that wasn't helping my life. Or my cooking.

Do you all have any other tips? I'd love to hear what has and hasn't worked for you! 

(Also, I need to take my own advice! I am just horrible at putting things away and not always good at setting up things that work for me, but that's the point--right? To take time to set this stuff up; to stop and think about it.)

Now, onto the bathroom!

I've started a new blog: Come follow my crafting adventures on my new blog. Find me at: creativeirony.com.

Thursday, September 06, 2012

How I Organized My Entire House for Zero Dollars (Really!)


a blogger tells how she organized her house without spending any money

Maybe it's the kids going back to school, maybe it's just because I've reached my breaking point, or maybe it's because of no good reason, but the disorganization in my house has got to grow up and leave already. I am tired of it. I'm tired of not being able to find things. I'm tired of sighing when I see certain areas of my house. I'm just fed up.

When I've tried to organize my house before, it's gone like this (this may sound familiar to you--perhaps you have felt similarly?): I am motivated. I see beautiful pictures of organized spaces on Pinterest! Oooooo, so pretty. Wow, I want my house to look like that! I need containers! I need all the pretty containers! Must buy containers now! I need all the things! Wait, I have no money for containers! Sad face. I organize some things halfheartedly, maybe buy a few little pretty containers (I actually have about five times as many jars now, see picture above), but my money seems to have other priorities (new water heaters, piano lessons, um, thrift stores), and I think, sheesh, if I just had pretty containers, it would stay all pretty and organized and birds would sing outside my windows all day long and my children would never complain about doing their chores or putting away their toys and I would be soooo motivated to keep it nice. While it might be true that pretty spaces and pretty containers might keep me slightly more motivated, the problem is me.

I've started a new blog: Come follow my crafting adventures on my new blog. Find me at: creativeirony.com.