Follow My New Blog

I've started a new blog. Follow my crafting adventures on creativeirony.com.

Showing posts with label clothes. Show all posts

Monday, March 16, 2015

How to Convert a Dress into a High-Low Tunic

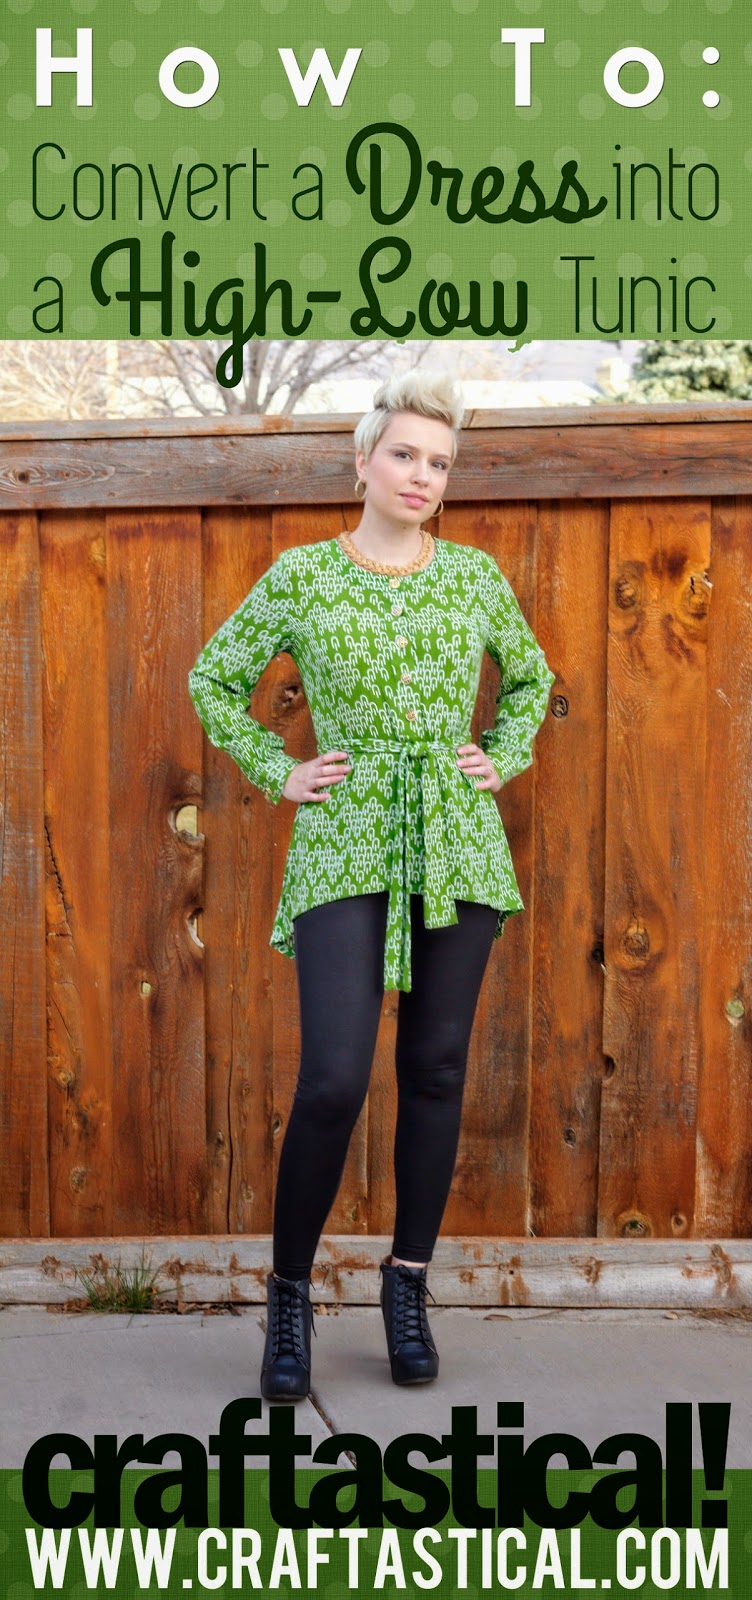
How to convert a dress into a high-low tunic from Craftastical!

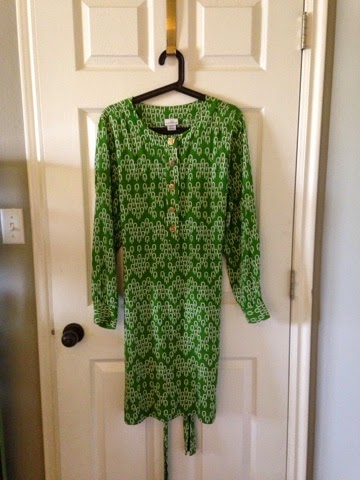
Saint Patrick's Day is upon us, and I realized I have very little green in my wardrobe, which is unacceptable. I searched through three stores, not finding anything green that looked good on me, and finally found a cute green dress at the local thrift store in town, AND it was half off day, so the grand total for this dress? $2.50. Only, it was a bit. . . frumpy? Action had to be taken.

Dress before high-low tunic conversion

I decided to modernize it by making it into a high-low tunic. It was actually a lot easier than I was expecting and only took me about 30 minutes. I love any sort of thrift store find (half my wardrobe is from thrift stores or consignment shops), and I love all things upcycled and restyled.

Here's my tutorial, so you can try it too.

STEP ONE
First, put on your dress/skirt/extremely long shirt, whatever you are converting. Mark the length of the front hem with a pin exactly in the middle (I would actually use safety pins--one of mine fell out when I took off the dress). Do the same with the back. Obviously, the back is going to be anywhere from 3-4 inches longer to, well, as long as you want. Drama, baby.

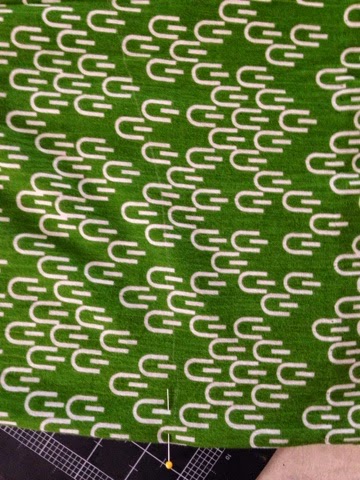
Front pin (hard to see with that pattern, but it's there):
Marking the dress hem in the front

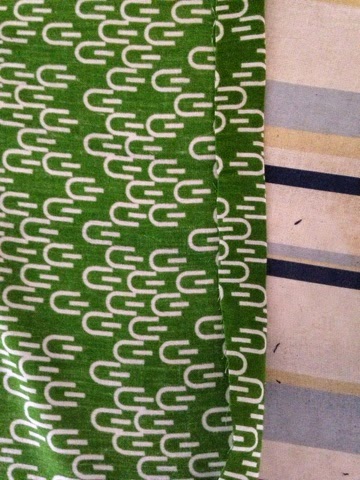
Back pin:
marking the dress hem in the back

STEP TWO
Next, you're going to cut your hem. Remember to leave 1-2" of seam allowance.

To mark the hemline, lay the garment on its side, with the side seams matched up. This should leave your marking pins on the fold lines for the front and back.

Side seams matching and folded exactly along the front and back:
setting up the hem to be cut

Draw your line for your hem (remember seam allowance). This is probably the trickiest bit. Remember you're going to want to hit the fold at a right angle so you don't create a point, and you're going to want most of the "high-low" movement to happen at the sides, leaving the front and back fairly level.

I used a white fabric pencil to mark my line:
marking the hem line

I used a rotary cutter to make a smooth cut. Fabric scissors will do the same thing though. Cut through both layers of fabric at the same time. Once you've cut your line, try on the garment again before hemming, to make sure you like the line. I realized my cut wasn't curvy enough the first time, and cut a tiny bit more off, after I lined everything back up again.

My finished cut:
the finished cut hem line

STEP THREE
Once I had my hem line like I liked it, it was time to iron the hem. Turn up however much you allowed, and iron. You're going to want to finesse this a bit--you've got some curves and that's always a bit tricky to get to iron flat, but most fabrics will adjust if you work them a bit.

Raw edge turned up:
ironing the hem line

Then turn the raw edge under again, making it meet the ironed fold and press.

Raw edge turned under again towards fold:
ironing the hem line

Once that's all done, stitch the hem down. You can use a machine or hand sew. I chose to hand-stitch my hem, but a machine will do the job just as well. Just make sure to ease as you go, since you're sewing curves here.

Hand stitching my hem down with matching thread:
hemming upcycled dress

Then wear your new tunic with pride! I love how mine turned out.

How to upcycle a dress into a high-low tunic from Craftastical!

Also, one of my friends calls this hemline a mullet hem, and I'm pretty sure that wins the internet.

Linked Up Here:
Tatertots and Jello
I've started a new blog: Come follow my crafting adventures on my new blog. Find me at: creativeirony.com.

Wednesday, June 15, 2011

UFO, I'm coming for you.

Over the past three weeks, I've been working on my unfinished objects. I'm killing them off, one by one. 13 out of 41 are done (although I don't thing everything in my unfinished box is on that list--I may need to do a little revising--still it's close enough).

Some of them have turned out cute. Some of them, not as cute. But, the most important part of this process is that they are done and I can either give them away (even if it's to the thrift store) or start using them or realizing that I'm not going to use them. Such is the way of the things I make. I'm pretty sure that Aubrey does not like the dress I finished for her.

Anyway, here's the list as it looks so far.

Spray paint frames
Tree tote bag
Pettycoat skirt
Ampersand
Yellow rosette pillow
Patches on jeans
Long blue tank refashion
Box purse
Let out Citrus halter
Sew pom pom on poncho
Crochet tan bag
Blue and brown crochet hoodie
White floaty scarf

Pink shirt refashion
Wrap around vest refashion
Crochet fingerless gloves
Repair pink and grey hair flower
Hexagon quilt
Thanksgiving wall hanging
Rehang crochet butterfly in kitchen
Garden quilt
Grandkid silhouettes
Gold sweater
Yellow flower/pink flower/pink felted flower/purple headband/pink cuff
Curtains
Green knitted buckets
Painted linen skirt
Blue serving stand
Braided rug
Mom's messenger bag
Santa Claus wall hanging
Repair grey and pink hair flower
Grandma Jensen quilt--blues and purples
Crochet beaded bag
Butterfly embroidery
Wool scarf
Cross stitch Noah's Ark
Blue and Pink diamond quilt
Orange and green diamond quilt
Mom's Christmas present albums
Bag embroidery

Now to the good stuff. Pictures.

I've started a new blog: Come follow my crafting adventures on my new blog. Find me at: creativeirony.com.

Monday, November 29, 2010

Make It Your Own--Northridge Publishing

A few weeks ago, I had the chance to film with Kristine McKay from Northridge Publishing. It was so much fun to be in front of the camera and I hope I don't seem too goofy, shifty-eyed or nervous. I had a blast, and here's one of the segments we filmed.

Many thanks to them for having me!


And the super-sassy photo of Aubrey I took with her in the skirt (which weirdly printed up backwards on my printer the morning of filming, but I didn't have time to print a second, not-backwards version):

And, a close up of the owl:
I've started a new blog: Come follow my crafting adventures on my new blog. Find me at: creativeirony.com.

Thursday, July 08, 2010

Share-A-Craft: Bobble Crochet Dress

About 18 months ago, I started a crochet dress for Aubrey from this amazing pattern when we went up to Logan to visit some family. It took forever to finish. I think I took it out three times before being happy with it. Then, I ran out of yarn. It was just some cheapy cotton Peaches and Cream, but every store stopped carrying that color. I checked every last Joann's, Michael's, Walmart, etc, for it, and could not find the darn stuff.

Eventually, I decided to just finish it with white. Which turned out darling, I think.

The other morning, Maxton was helping Aubrey get dressed and he came up with two choices of leggings to go with this dress. Now that she's grown a bit, it's more like a tunic, so it needed the leggings. I absolutely loved it with the butterfly leggings and I'm not sure I would have ever put them together.

Isn't she getting so dang tall? She just turned three. What is she doing with those long limbs? At least, she still has the round baby tummy.

At some point, I'm going to have to make this again, but with nicer yarn.
I've started a new blog: Come follow my crafting adventures on my new blog. Find me at: creativeirony.com.

Thursday, June 10, 2010

Share-A-Craft: Toddler Rag Tag T-shirt Skirt

I have an addiction to sewing skirts. They are just so simple, fast and fun, and Aubriana loves to wear them.

I didn't get a before picture, but this skirt is made out of an old t-shirt of mine. I've always loved the color and it's so soft, but it had gone the way of all cotton shirts in my house and shrunk. I hope it shrunk. I might have increased a tiny bit.


I love the flowers on the side and the easy draw-string (made out of the hem of the shirt). I basically followed this tutorial, with a few modifications. I plan on doing this pattern again, with a few more modifications to make it a tiny bit easier (like cutting two tiers, sort of like I did with my petal skirt).

Of the three skirts I made her for her birthday, I think this is my favorite, but only by a tiny margin.

Linking Up Here:
HookingupwithHoH


Show and Tell Green


I've started a new blog: Come follow my crafting adventures on my new blog. Find me at: creativeirony.com.

Monday, May 03, 2010

Tutorial: Knife Pleat Toddler Skirt Pattern

A year ago, I made this skirt for Aubriana. I still love it and she sometimes wears it still. I never made up a pattern to share though, so I made it again recently, so I could share the pattern. I love the jean version just as much as the pink polka dots.

Here's a few shots of the finished skirt. The bottom is knife pleats, which are the simpliest kinds of pleats. The back is elastic and there's a little belt built into the front. It's a pretty easy pattern, although the pleats are a little time consuming. Still, it's a project you could do in a day.

Not sure I'm crazy about this shirt with it, but hey, I was running out of light, so I went with it. I love this shirt, but it might be a tad bit busy with the skirt.

Ok, first off, supplies (may vary depending on the size you're making, my yardage is based on size 3T):
1/3 yard main fabric (I used denim, but you can easily use a lighter cotton)
1/3 yard accent fabric
1 yard 1/4" elastic
A little fusible interfacing (a piece about 13X4" is all you will need)
1.5 yards bias binding tape

Step 1:
Measure your subject. This pattern should work for sizes up to 5T. You need the waist measurement. Once you have this, divide by two, then add 1 inch. The guide line on your pattern should be this long when you print it. I made size 3T, with a guide measurement of 11".

Step 2:
Download the pattern, then print to size. Cut out pattern pieces as indicated.

Step 3:
Iron the belt pieces in half, with right sides together.

Stitch around the curve, then down the open side. Turn. Press flat. Top stitch all around the edges. Set aside.

Step 4:
Next, prep the belt loops. Iron in half, then fold the outsides to meet the fold in the center. It will look something like this.

Fold in half, encasing the rough edges along the length, then topstitch the sides. I probably didn't get quite as close to edge as I would normally want.

Set aside.

Step 5:
Ok, now the real stuff begins. Adhere the interfacing to the wrong side of the front facing. I didn't want to hem it, so I just zig zag stitched along the bottom edge since it will be on the inside, but I didn't want any fraying to happen.

Put right sides together with front piece, and stitch along top, with about a 1/2" seam allowance. Iron open.

Step 6:
Iron back band in half lengthwise, wrong sides together. Stitch 1/2" from bottom, then 1/2" below that, then 1/2" below that.

Cut 3 pieces of elastic the same length as the guide. Using a safety pin, feed the elastic through. I usually tack it down once it gets close to the end, then I finish pulling it through, then tack that side down (see photos). You want it to be just a tiny bit (like within 1/2") shorter than the front piece.

Trim elastics and pull taut to evenly distribute gathers.

Pin together the right side of the back piece and band (doesn't have right or wrong sides yet), evenly distributing the gathers.

Sew, with 3/8" seam allowance. Press.

Step 7:
Pin the belt to the sides of the skirt, about 1/4" from the top. Baste in place, leaving the facing free.

Pin the ends of the belt to the center and out of the way. You might want to use safety pins, because I kept poking my fingers with the straight pins.

Step 8:
I've started a new blog: Come follow my crafting adventures on my new blog. Find me at: creativeirony.com.

Monday, April 19, 2010

Share-A-Craft: Totally Free Prom Dress Makeover

Share-A-Craft is just as much fun as a tilt-a-whirl, but with less stomach upset and possible vomiting. Every Monday, I post a project of any type that I've recently or not so recently done. We'd love to see what you've been making too. Send me an email with your name and a link to your project at karah99 @ gmail.com and you might end up featured.  

A few weekends ago, my aunt Angie and her family came down to visit. You might remember her from my cruise post--she organized the whole cruise and is generally just a fun-loving, energetic person, the perfect person to have around for some fun. We had pretty much laughed the entire time, and we fixed fondue, played Guesstures, watched movies and generally had a great time.

My cousin, Sadie, is 15 and she got asked to the prom. On their way down to our house, they picked up a previously owned prom dress that was just stunning. The only thing was, Sadie is 5'10" (we grow them tall in our family, my little sister, Melissa, excluded) and the girl she bought the dress from was 5'2" (coincidentally, the same height as my sister). This left the dress way too short and at an awkward length.


This is the before shot:

They asked me to help them make over the dress. We thought about putting on a ruffle, and that probably would have cost money and might have ended up looking tacked on. After a little thinking and brainstorming, we decided to ruche up the sides.

After gathering the sides, the dress was still too poofy and it didn't really shorten the dress much at all. I've never tried ruching before, so this was a learning experience. We decided to do some more gathering and making scallops around the bottom. After a little fussing, a lot of hand sewing and a little machine sewing and hemming around the underskirt (petticoat-type stuff, whatever it's called), we had the hem done.

She also wanted to beef up the straps some more and the dress had come with a little scarf thing, so a little more gathering and some hand sewing, and we had this:

It's so beautiful on her, so current, yet a bit more princessy, and totally original.

The best part, the make over part was completely free!

Sharing Here:
I've started a new blog: Come follow my crafting adventures on my new blog. Find me at: creativeirony.com.

Thursday, April 15, 2010

Tutorial: Toddler Sized Petal Skirt Pattern

Remember when I was admiring Amy's petal skirt (I actually don't think this is the official meaning of a "petal skirt," but go with me here) on Project Runway, in this post? I have sewn up my own version and it is cute, cute, cute, even if I do say so myself.

You can look and see if you agree:

It's cute.

I also took pictures to write up a tutorial, so you can make one too. It's a pretty simple design and get this, there is no hem to sew. I hate hemming. Tedious and I almost always make mistakes.

Ok, first off, supplies:

Solid heavier weight fabric, about 1/3 yard to be on the safe side
3 coordinating prints, about 1/4 yard of each
Interfacing if desired, about 1/2 yard
1/4" elastic, about 1 yard

Yep, that's it.

Step One:
Now, you need to measure your subject. Bribe her with candy, if necessary.
Get a waist measurement, which was 20" for Aubrey.

Step Two:
Print out your pattern. Divide your waist measurement in half, and add one inch. This is how long your want your guide line to be. It should be 11"  or so for size 3T. Print full-size on 8.5x11 paper for a skirt exactly my size (but you can easily scale the pattern up or down in your printer settings). The first page is an overview of the pattern, then the individual pages are after that. I've never tried to do a printable pattern like this, so I'm open to any suggestions you might have. Let me know if something isn't working.


Cut all pieces from solid fabric except for petals. Cut 48 petals in three of the fabrics, or 16 in each color. I always cut them out two at a time. If you want to use interfacing on your petals, add it now. You would need 24 interfacing petals.

Step Three:
Ok, first we are going to get those petals out of the way. Sew around the curve, leaving the top open. I used a 1/4" seam allowance. The key to making them lie flat is to turn smoothly, and not rumple them up as you turn. Another great tip is to chain stitch, this means you leave each piece on the thread, don't clip or pull it from your machine before starting another petal. You will want a tiny space, maybe two stitches between the pieces. This saves enormous amounts of time and thread.

You might also notice later that I was having fun mixing up the backs of my petals, but feel free to sew like to like and save yourself the trouble of making them different and confusing. Sometimes the first run of a project isn't as thought through as I would like.

One you have all the petals sewn together, you need to clip the seams. I cut about 1/2" apart. This is tedious, but essential if you want non-lumpy petals. You should be seriously impressed that I managed to take this next picture all by myself, by holding the scissors in my right hand and the camera in my left, while trying to see if the camera was focusing with my right eye and trying to hold the scissors both far enough away so that the camera could focus and so they stayed in the right position on the petal. Anyone out there looking for a job as a photography assistant? The pay is super stinky.

One you have them all clipped, turn them. They will look a little lumpy, like this.

You want to press them, making them as smooth as possible, without any corners. I find it easiest to put my hand inside it, open my hand slightly, then with the other hand, hold it down as I pull my other hand out, then press. The goal is to get the stitching to open up as much as possible and to get a uniformly curved shape.

Ok, once that is all done, top stitch the petals around the curve, again leaving the top open. Top stitching will help your petal keep its shape through the wash (as will the interfacing if you add it, which if I was making this skirt again, I would, even with how well it did hold up in the wash). Chain stitching is also encouraged on this step.

Take your petals and put them aside. I think it's probably smart to leave them on the chain, so you don't lose one as you're doing the other steps.

Step Four:
Now we are going to make the waistband. I'm not a professional seamstress, all self- and mom-taught, so this might not technically be the "right" way, but it works for me and is a technique I use on all of Aubrey's skirts and pants, when I don't want gathers in the front. This method has gathering only in the back, leaving the front smooth, much like most of the store-bought toddler pants and skirts.

First off, take your back piece and fold it in half, hot dog way (this is a technical sewing term, bet you all are impressed, huh?). Iron it. Next, stitch about 1/2" down from the top of the fold. Then sew a second line 1/2" down from the first and a third and final line about 1/2" down from the second line.

Cut three pieces of 1/4" elastic using the waist line guide on the pattern. Thread one through each casing you just sewed, using a safety pin is the easiest way for me, and tack the ends down.

Your finished piece will look like this all bunchy (sorry it's not the greatest picture, but you get the idea).

Now, take the front waistband piece and iron it in half, lengthwise as well. Line up the bottom of the back waistband and the bottom of the front. At this point, your gathered piece doesn't really have a front or back, but you want the right side of your front section to be up and against the back piece. Sew the each of the sides, stopping once you get to the middle.

Next, flip it around and iron the fold, basically extending the line of the sewing you just did with a crisp seam. It should look something like this (hopefully your ironing skills are better than mine):

Flip the whole thing around and fold along the top. You should basically have a tube, with the elastic ends of the back waistband encased inside the front waistband and the raw edges all along the bottom. Then, top stitch along the sides to hold in place. You are now finished with the waistband! I'm really regretting that I did my example in white. I hope you can see enough to get the general idea.
Step 5:
Next, put right sides together of the skirt tiers (C with C, and D with D), sew sides seams. Press open. Then find the center top, right side (there should be a notch here) and center and pin a petal to the top (clip apart the ones you are using for the top tier). Do the same for the back and sides, then fill in around the top, pinning a petal between each of the petals. This should give you 8 petals total. Just a note that if you used the same fabric for the front and back, the petals don't really have a wrong or right side, which is nice for these petal steps. It's going to look something like this, with petals all around and right sides of all pieces facing out:

Then baste the petals to the tier, using a long stitch. Pin to waist band, with right sides together, matching centers and side seams. Then, pin the gathers in the back, making them as even as possible. It should look something like this:

Then sew. Iron the seam up towards the waistband. Then top stitch, about 1/8" above the seam, all the way around. Just sew right over the gathering in the back.

Step 6:
For the next tier we repeat the same basic process, with a few variations.

Again, start with pinning the petals to the top of the 2nd tier piece D. Offset the petals, so you get a fish scale effect when combined with the top tier.

Baste the petals to the tier, then pin to the bottom of the skirt so far, putting right sides together and lining up marks. As you sew, pull the petals on the top tier out of the way.

Iron, then topstitch just above the seam.

Step 7:
Again, this is the same basic process, with a few variations. Along the bottom of the 2nd tier, pin petals. This is slightly different from the last two steps, because you want to pin the remaining raw edges together, and the petals will face up, with the right side (if your petals have such a thing) down against the right side of the tier. Use the same positioning pattern as the first set of petals (admittedly, I didn't do a great job with this. Also, please note that the petals are closer together and have a lot more overlap on the top of the skirt than they do at the bottom).

Sew around the bottom of the skirt, securing the petals (no need to baste on this step). Again, iron seam toward top of skirt and top stitch. Trim any threads, and that's it! You're done and your skirt is ready to wear!
Let me know if you have any questions; I'd love to help clarify anything. I hope this tutorial inspired you.

Linking Up Here:


Join us Saturdays at tatertotsandjello.com for the weekend wrap up party!


Visit thecsiproject.com
I've started a new blog: Come follow my crafting adventures on my new blog. Find me at: creativeirony.com.