Follow My New Blog

I've started a new blog. Follow my crafting adventures on creativeirony.com.

Showing posts with label Mod Podge. Show all posts

Monday, November 07, 2011

Black and White Mod Podge Stool Makeover (With Tutorial!)

A few weeks ago, I had a friend coming over to see my house for the first time. I was (frantically) cleaning the morning before she was supposed to come. (Clarice, if you're reading this, that's a total lie. My house is always immaculately clean. I was lounging on the couch eating organic, designer doughnuts and pirouette rolled wafers without making a single crumb and miraculously not taking in calories for hours and hours before your visit. I swear it.)

I was cleaning the bathroom, and I decided that my white stool was never going to look clean on top and that painting it white was the worst decision of my life. Because, clearly, paint weighs out over anything else, including the credit card debt I started accumulating in college. Nope, nope, white paint on this stool--MUCH, MUCH worse.

I bought it for $5 at an antique shop, and it was clearly someone's shop stool. It had drill marks down through the top. But, I liked it. I think it has charm.

The Before:

The After:

I've started a new blog: Come follow my crafting adventures on my new blog. Find me at: creativeirony.com.

Wednesday, August 03, 2011

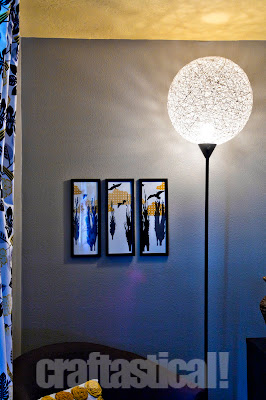
The Pinterest Challenge--A Floor Lamp Make-Over

String ball lamp--cool lamp make-over for a Pinterest challenge

A little bit ago, Sherry from Young House Love got together with a few of her friends and issued a Pinterest challenge, the idea being to actually use Pinterest to inspire you to make something, and not just to glamour you like a time-sucking vampire with the pretty colors. Oooooo, pretty colors.

Surprisingly, I actually have used Pinterest a few times to inspire real-life projects. How is it that so many projects do not end up on the blog??? My sister and I spent a whole day once doing naughty things to t-shirts (like cutting them up and then not even sewing proper hems on them!) inspired by Pinterest projects. I guess most of those ended up belonging to Melissa, which is why they didn't show up here.

I've started a new blog: Come follow my crafting adventures on my new blog. Find me at: creativeirony.com.

Wednesday, July 06, 2011

A Pretty for My Living Room

joint compound on canvas sculpted with forks and knives, then painted with acrylic paint

The living room of my house was the first I designed in my head. I lost sleep over the thing! I did sketches! I spent hours virtual shopping. I've researched couches and searched and searched for the perfect one. I even posted a mood board of sorts before we even bought our house--you can find it here. I've since changed my mind about the couch. About 30 times.

I've started a new blog: Come follow my crafting adventures on my new blog. Find me at: creativeirony.com.
Wednesday, June 15, 2011

UFO, I'm coming for you.

Over the past three weeks, I've been working on my unfinished objects. I'm killing them off, one by one. 13 out of 41 are done (although I don't thing everything in my unfinished box is on that list--I may need to do a little revising--still it's close enough).

Some of them have turned out cute. Some of them, not as cute. But, the most important part of this process is that they are done and I can either give them away (even if it's to the thrift store) or start using them or realizing that I'm not going to use them. Such is the way of the things I make. I'm pretty sure that Aubrey does not like the dress I finished for her.

Anyway, here's the list as it looks so far.

Spray paint frames
Tree tote bag
Pettycoat skirt
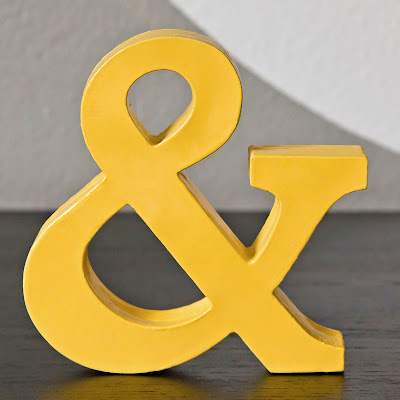
Ampersand
Yellow rosette pillow
Patches on jeans
Long blue tank refashion
Box purse
Let out Citrus halter
Sew pom pom on poncho
Crochet tan bag
Blue and brown crochet hoodie
White floaty scarf

Pink shirt refashion
Wrap around vest refashion
Crochet fingerless gloves
Repair pink and grey hair flower
Hexagon quilt
Thanksgiving wall hanging
Rehang crochet butterfly in kitchen
Garden quilt
Grandkid silhouettes
Gold sweater
Yellow flower/pink flower/pink felted flower/purple headband/pink cuff
Curtains
Green knitted buckets
Painted linen skirt
Blue serving stand
Braided rug
Mom's messenger bag
Santa Claus wall hanging
Repair grey and pink hair flower
Grandma Jensen quilt--blues and purples
Crochet beaded bag
Butterfly embroidery
Wool scarf
Cross stitch Noah's Ark
Blue and Pink diamond quilt
Orange and green diamond quilt
Mom's Christmas present albums
Bag embroidery

Now to the good stuff. Pictures.

I've started a new blog: Come follow my crafting adventures on my new blog. Find me at: creativeirony.com.

Thursday, May 19, 2011

Tutorial: Ampersand for a Shelf

A little while back, I bought a K and D from Hobby Lobby to put on my picture ledges once they were built. The plan was to get an ampersand to put between them. Awww, too adorable, right? Kara and David=forever. But, I couldn't find one I liked. I'm sort of a font snob. Ok, not sort of. I am. Like nearly every other female craft blogger, I started a Pinterest account, and there are a lot of snobby font things pinned to my funny board. Most of them make fun of Comic Sans. Poor Comic Sans. If only people wouldn't put it where it has no business being! Then Comic Sans wouldn't be the ugly dog of the font world.

Anyway, I pondered on this problem for several months. I could have cut my own ampersand out of wood with my mom's scroll saw, but it's about 20 minutes away, and that's kind of annoying to get exactly right. I've cut out complicated things with a scroll saw before (see the cake topper here), so I could do it, I was just being moody about it.

Then it hit me. A way in which I didn't have to drive round trip 40 minutes and get out the scroll saw from the caverns of my parents' garage. And this is that tutorial.

cardstock ampersand, made by layering cardstock cut with Cricut


Supplies needed:
Scrap cardstock (or pretty cardstock in pretty colors)
Cricut machine or Silhouette machine or traditional die cut machine--I used a Cricut and Plantin Schoolbook cartridge
Mod podge
Sandpaper or rotatory tool
Wood filler
Spray Primer
Spray Paint

Step 1: Cut out a bunch of shapes of the same size. I didn't care about color, because I knew I was going to paint mine later. If you don't want to paint, you can use pretty colors in the same shades or coordinating shades for very pretty effects, or use all the same colors.

I've started a new blog: Come follow my crafting adventures on my new blog. Find me at: creativeirony.com.